Imagine the scenario – you’ve got customers all over the world all requesting binary files from you. To speed up your delivery, you want to utilize a CDN. Furthermore, all of the files needs to be protected on a specific user session level. Basically, you need to grant access to the specific file when a given user logs in – it’s not enough just to have a “hidden” URL or a URL with an infinitely sharable policy in the query string.
To do this, we’ll need to set up a private S3 bucket, a private CloudFront distribution, a bucket policy on said bucket so CloudFront is able to access the data, and finally we need to generate signed policies for the users on the fly, so they may retrieve the files using CloudFront.
To keep this post simple (relatively speaking), I’ll assume you’ve got a completely empty AWS account with access to S3 and CloudFront. Don’t worry if you’ve got existing content, you’ll just need to modify the scripts slightly to access the right objects (as I’m assuming an empty account, I’ll just access the first element here and there, instead of the specific one).
Why you don’t want to rely on third party GUIs
Admittedly, I used Bucket Explorer to begin with, to help me set up access identities and private distributions. However, as soon as I had a need that Bucket Explorer couldn’t help me with, or I had hiccups, I was totally lost. If you rely on third party GUIs to do the setup for you, you have very limited understanding of what’s actually being set up beneath the covers, and as such, you’ll be in a pickle when (no, not if!) something goes awry. Once you’ve done the setup by hand, you may later start using tools, but only if you understand what they’re doing.
Note that this is not a bash on Bucket Explorer, just my opinion never to use tooling before you understand what they do, just as I wouldn’t recommend you use TortoiseGit before you know the command line by heart.
The AWS console only takes you so far
While the AWS console is great in itself, it’s really only meant for the simplest of tasks. Very quickly you’ll find yourself limited by what you can do. For what we’re about to do, all you’d be able to do through the console GUI is to create a bucket, the rest would have to be done through code. To keep things consistent, I’m sticking to code for all tasks.
Before we start, download the Amazon AWS .NET SDK and create a template console application like this:
using System;
using Amazon;
using Amazon.CloudFront.Model;
using Amazon.S3;
using Amazon.S3.Model;

namespace AWSTest
{
    class Program
    {
        private static string accessKeyID = "AKI...";
        private static string secretAccessKey = "w49...";

        static void Main()
        {

        }
    }
}
Make sure to insert your own access key ID and secret access key values. All code samples posted from now on should go into the Main() method body.
Creating the private bucket
Run the following code to set up a bucket, which will be private by default. Make sure you define a unique bucket name, I’m using the name improve.dk for this sample. Note that if your bucket is not in the EU region, you’ll need to substitute my ServiceURL with the one for your region. You can find all the service URLs here: http://docs.amazonwebservices.com/general/latest/gr/index.html?rande.html
var config = new AmazonS3Config()
	.WithServiceURL("s3-eu-west-1.amazonaws.com");

using (var s3Client = AWSClientFactory.CreateAmazonS3Client(accessKeyID, secretAccessKey, config))
{
	var request = new PutBucketRequest()
		.WithBucketName("improve.dk")
		.WithBucketRegion(S3Region.EU);

	var response = s3Client.PutBucket(request);
}
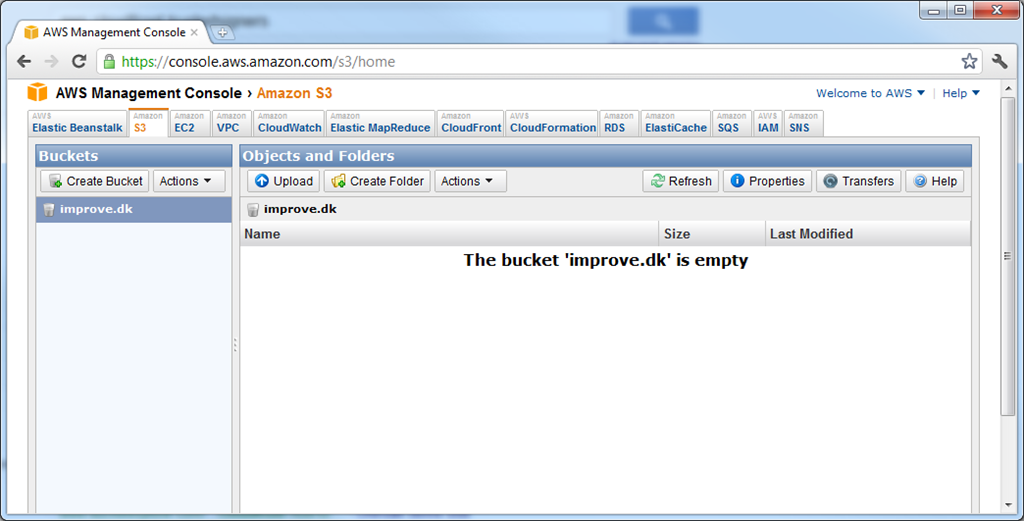
If all goes well, you should see your bucket in the AWS console immediately hereafter:
Creating a CloudFront Origin Access Identity
Now that we’ve got our bucket, we need to create the private CloudFront distribution. However, we also need to concoct a way for the private distribution to gain access to our private bucket. We can do so by utilizing a special type of CloudFront identities called Origin Access Identities, which I’ll be referring to as OAI’s.
Creating an OAI allows us to tell CloudFront to access the S3 bucket using that OAI. On the bucket side, we can then create a policy granting access to that specific OAI, and thus enabling our private distribution access to our private bucket.
Run the following code:
using (var cfClient = AWSClientFactory.CreateAmazonCloudFrontClient(accessKeyID, secretAccessKey))
{
	var oaiConfig = new CloudFrontOriginAccessIdentityConfig()
		.WithComment("OAI used for private distribution access to improve.dk bucket.");

	var request = new CreateOriginAccessIdentityRequest();
	request.OriginAccessIdentityConfig = oaiConfig;

	var response = cfClient.CreateOriginAccessIdentity(request);
	Console.WriteLine(response.OriginAccessIdentity.Id);
	Console.WriteLine(response.OriginAccessIdentity.S3CanonicalUserId);
}
This creates a new OAI with a comment. Furthermore it prints out two bits of information that we’ll need shortly – the OAI ID and the OAI S3 canonical user ID. These are two different ways of identifying the OAI, and we’ll need both, so make sure to jot them down.
Creating the private CloudFront distribution
Now that we have our bucket and OAI, we can set up a private CloudFront distribution and point it at the S3 bucket.
Run the following code:
using (var cfClient = AWSClientFactory.CreateAmazonCloudFrontClient(accessKeyID, secretAccessKey))
{
	var oaiIdentity = cfClient.ListOriginAccessIdentities().OriginAccessIdentities[0];

	var distributionConfig = new CloudFrontDistributionConfig();
	distributionConfig.S3Origin = new S3Origin("improve.dk.s3.amazonaws.com", oaiIdentity);
	distributionConfig.Comment = "Private distribution for accessing the improve.dk bucket.";
	distributionConfig.Enabled = true;
	distributionConfig.TrustedSigners = new UrlTrustedSigners().WithEnableSelf(true);

	var request = new CreateDistributionRequest();
	request.DistributionConfig = distributionConfig;

	var response = cfClient.CreateDistribution(request);
}
This starts out by fetching the OAI we created just before. It then creates a new distribution configuration, specifying the improve.dk S3 bucket as the source, using the OAI for authentication. The TrustedSigners parameter determines who will be able to sign (and thereby grant access) to the distribution later on. For this demo, we’ll just grant access to our own AWS account. You may grant access to up to 5 other AWS accounts, should you so wish.
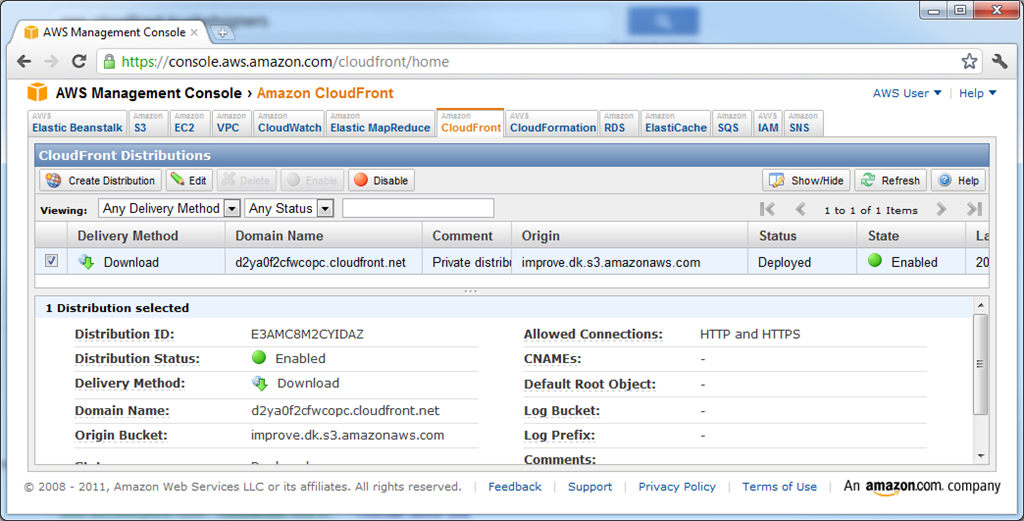
Once run, you should immediately see your distribution being in the InProgress state in the AWS console. This picture is taken approximately 10 minutes later, when the distribution enters the Deployed state:
Setting up a bucket policy to grant our OAI access to the S3 bucket
When we upload objects to our bucket, we could grant access to the OAI on each specific object. That will require an extra request for each upload though, as we can’t assign ACL’s at the same time as we create objects. It would also be a major hassle if we ever were to change our OAI/distribution. To make it easier, we can create a bucket wide policy that grants access to all the objects in the bucket, for one specific OAI.
Open up the AWS Policy Generator tool in a new window. Make sure to select the S3 Bucket Policy type. In the Principal field, enter the S3 canonical user ID of the OAI we created earlier. For actions, only select the GetObject action – this allows the distribution to retrieve an object and nothing more. For the ARN, use this, though with your own bucket name:
arn:aws:s3:::improve.dk/*
That ARN will ensure the policy covers all objects in the bucket, no matter their name. Now click the Add Statement button, followed by the Generate Policy button. What you’ll end up with is a JSON based policy like this:
{
  "Id": "Policy1319566876317",
  "Statement": [
    {
      "Sid": "Stmt1319566860498",
      "Action": [
        "s3:GetObject"
      ],
      "Effect": "Allow",
      "Resource": "arn:aws:s3:::improve.dk/*",
      "Principal": {
        "AWS": [
          "7d76be60a0acc160399f6d6750bdc9d4d78d16a58a30987844d4df010f2ded483a9e73b8b0877089fab75f5d0b591dee"
        ]
      }
    }
  ]
}
However, this won’t work yet! You need to change the “AWS” principal value into “CanonicalUser”, like so:
{
  "Id": "Policy1319566876317",
  "Statement": [
    {
      "Sid": "Stmt1319566860498",
      "Action": [
        "s3:GetObject"
      ],
      "Effect": "Allow",
      "Resource": "arn:aws:s3:::improve.dk/*",
      "Principal": {
        "CanonicalUser": [
          "7d76be60a0acc160399f6d6750bdc9d4d78d16a58a30987844d4df010f2ded483a9e73b8b0877089fab75f5d0b591dee"
        ]
      }
    }
  ]
}
Now that we have the policy ready, we need to add it to our bucket. Run the following code:
var config = new AmazonS3Config()
	.WithServiceURL("s3-eu-west-1.amazonaws.com");

using (var s3Client = AWSClientFactory.CreateAmazonS3Client(accessKeyID, secretAccessKey, config))
{
	var request = new PutBucketPolicyRequest();
	request.BucketName = "improve.dk";
	request.Policy = "{ "Id": "Policy1319566876317", "Statement": [ { "Sid": "Stmt1319566860498", " +
		""Action": [ "s3:GetObject" ], "Effect": "Allow", "Resource": "arn:aws:s3:::improve.dk/*", " +
		""Principal": { "CanonicalUser": [ "7d76be60a0acc160399f6d6750bdc9d4d78d16a58a30987844d4df010f2ded483a9e73b8b0877089fab75f5d0b591dee" ] } } ] }";

	var response = s3Client.PutBucketPolicy(request);
}
Make sure you escape your policy properly. There’s no need to concatenate it over multiple lines, I just did so only to avoid too much website distortion when displayed here.
Uploading a test object
To test everything out, we need to have a test object in our bucket. It can be anything, though an image is probably the easiest to test with. I used this little dapper AWS logo:
Run the following code to upload the object:
var config = new AmazonS3Config()
	.WithServiceURL("s3-eu-west-1.amazonaws.com");

using (var s3Client = AWSClientFactory.CreateAmazonS3Client(accessKeyID, secretAccessKey, config))
{
	var request = new PutObjectRequest()
		.WithFilePath(@"C:logo_aws.gif")
		.WithBucketName("improve.dk");

	var response = s3Client.PutObject(request);
}
Make sure to substitute with your own bucket name as well as the correct path for whatever test file you’re using. Immediately after running this you should see the file in your bucket:

If you enter the properties of the object, you’ll see a link like this:
https://s3-eu-west-1.amazonaws.com/improve.dk/logo_aws.gif
If you try to access the URL directly, you should get an error like this:

This is expected, given that our bucket is private and we’re currently accessing the object directly from the bucket. If you go back to your distribution, you’ll see a domain name like d2ya0f2cfwcopc.cloudfront.net. Try substituting the S3 domain name with the one of your distribution, like so:
https://s3-eu-west-1.amazonaws.com/improve.dk/logo_aws.gif => https://d2ya0f2cfwcopc.cloudfront.net/logo_aws.gif
Accessing the distribution URL doesn’t help however:
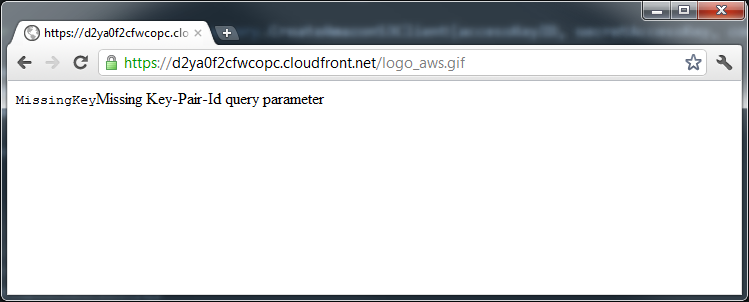
Once again we’re not allowed access. This time not due to S3 policies, but due to the distribution being private and thus requiring signed URLs.
Creating a time limited signed URL for a given object
Now that we have the URL of our distribution object, we need to sign it with a policy granting access to it for a given time period. To do the signing, I’ve create a class based on Gael Fraiteurs post on Stack Overflow. His class deals with canned policies, whereas this one deals with custom policies as they’re a bit more dynamic, configurable and thereby powerful.
Add the following class to your project:
using System;
using System.Security.Cryptography;
using System.Text;

namespace AWSTest
{
	public class CloudFrontSecurityProvider
	{
		private readonly RSACryptoServiceProvider privateKey;
		private readonly string privateKeyId;
		private readonly SHA1Managed sha1 = new SHA1Managed();

		public CloudFrontSecurityProvider(string privateKeyId, string privateKey)
		{
			this.privateKey = new RSACryptoServiceProvider();
			RSACryptoServiceProvider.UseMachineKeyStore = false;

			this.privateKey.FromXmlString(privateKey);
			this.privateKeyId = privateKeyId;
		}

		private static int getUnixTime(DateTime time)
		{
			var referenceTime = new DateTime(1970, 1, 1);
			return (int)(time - referenceTime).TotalSeconds;
		}

		public string GetCustomUrl(string url, DateTime expiration)
		{
			string expirationEpoch = getUnixTime(expiration).ToString();

			string policy =
				@"{""Statement"":[{""Resource"":""<url>"",""Condition"":{""DateLessThan"":{""AWS:EpochTime"":<expiration>}}}]}".
					Replace("<url>", url).
					Replace("<expiration>", expirationEpoch);

			string signature = getUrlSafeString(sign(policy));

			return url + string.Format("?Policy={0}&Signature={1}&Key-Pair-Id={2}", getUrlSafeString(Encoding.ASCII.GetBytes(policy)), signature, privateKeyId);
		}

		private static string getUrlSafeString(byte[] data)
		{
			return Convert.ToBase64String(data).Replace('+', '-').Replace('=', '_').Replace('/', '~');
		}

		private byte[] sign(string data)
		{
			byte[] plainbytes = Encoding.UTF8.GetBytes(data);

			byte[] hash = sha1.ComputeHash(plainbytes);

			return privateKey.SignHash(hash, "SHA1");
		}
	}
}
Creating CloudFront key pairs
Before we can use it though, we need a CloudFront key pair. Go to the Access Credentials section of the Security Credentials section of the AWS console, click on the Key Pairs pane, and then click “Create a New Key Pair”. If successful, a key pair should have been created, and the private part of the key should have been downloaded as a .pem file automatically:

Make sure to save the .pem file as it cannot be recreated. If you loose it, you’ll have to create a new key pair. Note that these credentials have nothing to do with your access key ID & secret key – those are a completely separate set of keys. Before we can use the .pem secret key, we need to transform it into an XML format that RSACryptoServiceProvider can parse. Go to http://www.jensign.com/opensslkey/ and download the opensslkey.exe application – save it in the same directory as your .pem file. If you don’t like running the .exe, the source code is available for you to compile and run yourself.
Run opensslkey.exe and give it the name of your .pem file like so:
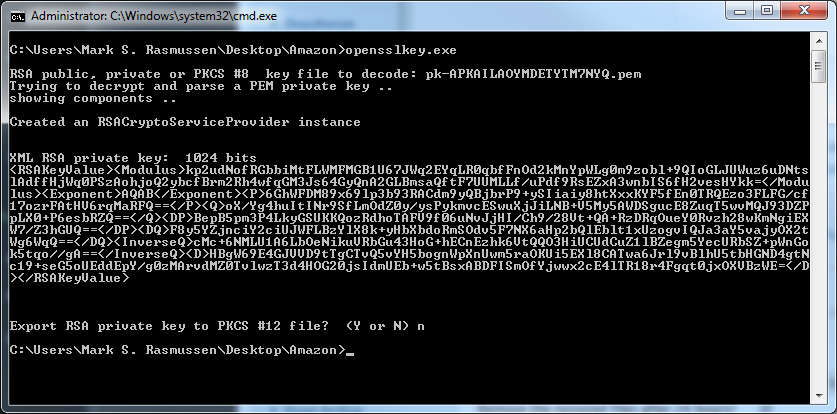
Creating the actual signed URL
One way or the other, copy that
[STAThread]
static void Main()
{
	string keyPairID = "APKAILAOYMDETYTM7NYQ";
	string secretKey = @"
		<RSAKeyValue>
			<Modulus>kp2udNofRGbbiMtFLWMFMGB1U67JWq2EYqLR0qbfFnOd2kMnY7UUMLLf/uPdf9RsEZxA3wnbIS6fH2vesHYkk=</Modulus>
			<Exponent>AQAB</Exponent>
			<P>6GhWFDM89x69lp3b93RACdm9yQBjbrP9+ySIiaiy8htXxxKYF5fEn0TRQEzo3FLFG/cf17ozrFAtHV6rqMaRFQ==</P>
			<Q>oX/Yg4huItINr9SfLmOdZ0y/ysPykmvcESwuXjJiLNB+V5My5AWDSgucE8ZuqT5wvMQJ93DZPpLX0+P6esbRZQ==</Q>
			<DP>BepB5pm3P4LkyGSUKKQozRdhoTAFV9f06uNvJjHI/Ch9/28Vt+QA+RzDRqOueY0Rvzh28wKmNgiEXW7/Z3hGUQ==</DP>
			<DQ>F8y5YZjnciY2ciUJWFLBzYlX8k+yHbXbdoRmSOdv5F7NX6aHp2bQlEblt1xUzogvIQJa3aY5vajyOX2tWg6WqQ==</DQ>
			<InverseQ>cMc+6NMLU1A6LbOeNikuVRbGu43HoG+hECnEzhk6VtQQO3HiUCUdCuZ1lBZegm5YecURbSZ+pWnGok5tqo//gA==</InverseQ>
			<D>HBgW69E4GJVVD9tTgCTvQ5vYH5bognWpXnUwm5raOKUitBsxABDFISmOfYjwwx2cE4lTR18r4Fgqt0jxOXVBzWE=</D>
		</RSAKeyValue>";

	var provider = new CloudFrontSecurityProvider(keyPairID, secretKey);
	var signedUrl = provider.GetCustomUrl("https://d2ya0f2cfwcopc.cloudfront.net/logo_aws.gif", DateTime.Now.AddMinutes(5));

	Clipboard.SetText(signedUrl);
	Console.WriteLine(signedUrl);
	Console.Read();
}
Note how we instantiate the CloudFrontSecurityProvider, passing in the CloudFront key pair ID and secret key. We then give it the complete URL of the file we want, including a time limit for when it should no longer be available – 5 minutes in this case. For the sake of simplicity, I’m automatically copying the URL to the clipboard so I can easily paste it into my browser and test it. In my case, my complete URL looks like this:
https://d2ya0f2cfwcopc.cloudfront.net/logo_aws.gif?Policy=eyJTdGF0ZW1lbnQiOlt7IlJlc291cmNlIjoiaHR0cHM6Ly9kMnlhMGYyY2Z3Y29wYy5jbG91ZGZyb250Lm5ldC9sb2dvX2F3cy5naWYiLCJDb25kaXRpb24iOnsiRGF0ZUxlc3NUaGFuIjp7IkFXUzpFcG9jaFRpbWUiOjEzMTk1NzkzNzd9fX1dfQ__&Signature=CBnOaq5mO~RHhHo9fmK~hIxYSG4RC4IuZHJtH8Yk00p97Ihhy-yYYdggqbkdY68L1Vf7POVCjbf7gpdC5hJ9AHl5bTeWZyHLQXzXstHlOF~BgAyxNUPWQvSZPcwY6qpkKzMwrq2OU4tut7749TAgYfXt3BiGPmQF-8GFIEXB8iI_&Key-Pair-Id=APKAILAOYMDETYTM7NYQ
By the time you read this, hopefully, the link should no longer be working. If you upload another file (IMAG0655.jpg in my case) and just substitute the filename, using the same policy, you’ll get the following error:

Using wildcards when signing URLs
So what if you want to grant access to many files at once, do we have to create a policy for each single one? Thankfully, no, we don’t! Say you want to grant access to all files in the folder “Test” (and remember, there is no such thing as folders in S3 – just objects named e.g. /Test/FileName.jpg). What we’d do is to create a policy like this:
var signedUrl = provider.GetCustomUrl("https://d2ya0f2cfwcopc.cloudfront.net/Test/*", DateTime.Now.AddMinutes(5));
That’s right, we can create custom policies for wildcard URLs too! Once you’ve got this URL, just substitute the asterisk for whatever file you want to request:
https://d2ya0f2cfwcopc.cloudfront.net/Test/A.jpg?Policy=eyJTdGF0ZW1lbnQiOlt7I... https://d2ya0f2cfwcopc.cloudfront.net/Test/B.jpg?Policy=eyJTdGF0ZW1lbnQiOlt7I... https://d2ya0f2cfwcopc.cloudfront.net/Test/C.jpg?Policy=eyJTdGF0ZW1lbnQiOlt7I...
All using the same policy, just with a different file paths.
Limiting the users IP address
At this point we’ve created a URL with a custom signed policy that grants access to a given resource (or wildcard) within a limited time period. However, within this period, the user may distribute the URL to anyone else, who will then also be able to access the resource. To hinder this, we can add the source IP address as an additional condition to the policy!
Add an overload to the GetCustomUrl function in the CloudFrontSecurityProvider class like so:
public string GetCustomUrl(string url, DateTime expiration, string allowedCidr)
{
	string expirationEpoch = GetUnixTime(expiration).ToString();

	string policy =
		@"{""Statement"":[{""Resource"":""<url>"",""Condition"":{""IpAddress"":{""AWS:SourceIp"":""<cidr>""}, ""DateLessThan"":{""AWS:EpochTime"":<expiration>}}}]}"
			.Replace("<url>", url)
			.Replace("<expiration>", expirationEpoch)
			.Replace("<cidr>", allowedCidr);

	string signature = getUrlSafeString(sign(policy));

	return url + string.Format("?Policy={0}&Signature={1}&Key-Pair-Id={2}", getUrlSafeString(Encoding.ASCII.GetBytes(policy)), signature, privateKeyId);
}
To use it, we just pass in an IP address in the CIDR format:
var signedUrl = provider.GetCustomUrl("https://d2ya0f2cfwcopc.cloudfront.net/D.jpg", DateTime.Now.AddMinutes(5), "212.242.193.110/32");
The above example would provide access to the D.jpg object for 5 minutes, but only for the 212.242.193.110 IP address specifically. We could grant access to a whole subnet by passing in the IP/CIDR 212.242.193.0/24, etc.
You can only use the date and source IP address for conditions, contrary to other AWS policies that allow a plethora of conditions. For a full description, see page 80+ in this document: http://awsdocs.s3.amazonaws.com/CF/latest/cf_dg.pdf
Conclusion
This seems way more complex than it… Who am I kidding? This IS complex to set up! However, at this point, you can upload any number of objects to your bucket, and you never have to consider object-level ACLs as it’s all handled by the bucket policy. You can also create any number of custom policies for your URLs using your private distribution, limiting both the time period in which the link is valid, as well as the source IP address. Once all of this is setup, it’s rather easy to use.
Utilizing private S3 buckets and private CloudFront distributions, we can now secure our content completely while having very fine grained control over who gets access. All this while we still utilize the CloudFront CDN to deliver the content from the destination nearest to the end user.
PS – before you remind me the remove them – all keys, user identities etc. have all been inactivated/removed.