During a recent plugin based project that I worked upon, I had to dynamically load assemblies and instantiate objects from those assemblies. Usually that’d require a lot of typecasting and nasty code, but thanks to generics we can make it a lot smoother.
I present to you my LoadPlugin function of my PluginHandler module:
using System.Reflection;
using System;
namespace MTH.Core
{
internalclass PluginHandler
{
publicstatic T LoadPlugin<T>(string file)
{
Assembly ass = Assembly.LoadFile(file);
foreach (Type t in ass.GetTypes())
if (typeof(T).IsAssignableFrom(t))
return (T)ass.CreateInstance(t.FullName);
returndefault(T);
}
}
}
The generic parameter defines the type that should be created from the specified assembly file, this also means that the function will return a strongly typed result of this specific type.
Inside the function we load the assembly and load through each type it hosts. For each type we check the IsAssignableFrom function which’ll check if the current type is of the specified type T, no matter if T is an abstract class, interface or any other type. If it matches, we return a new instance of that type. If no type match is found we return null so we can handle the problem in the calling function.
Note that this is a very simple example function, there are many unhandled parameters! Security for instance. In most scenarios you would probably want to check the identity of the loaded assembly and set the security permissions dependingly. Also it is not possible to pass constructor parameters, this would require an extension of the function to take in an array of objects as constructor parameters.
This is how easily we can load any number of plugins that have been placed in a certain plugin directory (in this case the plugins contains code that is to be run on application startup):
foreach (string file in Directory.GetFiles(Application.StartupPath + "\Plugins\Startup", "*.dll"))
{
	IRunnable startupPlugin = PluginHandler.LoadPlugin<IRunnable>(file);

	if (startupPlugin != null)
		startupPlugin.Run();
}
All that is required is that the assemblies in the PluginsStartup folder contain a type that implements the IRunnable interface:
You probably already know of the short link services that are around, www.makeashorterlink.com for instance. While the idea behind these sites are indeed good, I personally find it quite cumbersome to actually create the short links when I’m typing a forum post somewhere. In this post I’ll give an example of a short link system that enables one to easily create short links while typing in Internet Explorer, using an Internet Explorer addon that conveniently places itself in the context menu whenever we right click on some text and a .NET webservice that handles the short link functionality.
So how can we make it more convenient, so we won’t have to open up a new browser, go to the short link website, create the short link and copy it back into the other browser window? My proposal is that we create an Internet Explorer addin for the context menu like shown in the picture above. That means we can simply type the long url as normally, select it and the right click and select “Replace with short link” whereafter it’ll automatically get replaced by a corresponding short link.
The components
I won’t be hooking into any of the existing short link services as I really wan’t to show how such a service could be created from the bottom up, it’s actually quite simple. The complete service covers four separate projects. We have the actual Internet Explorer addin which is written in JavaScript. Then we have a .NET DLL that’ll be installed on the client machine, this is the one that’ll take care of the communication with the short link server. Furthermore we have the “Create a short link” webservice that’ll handle the actual creation of short links. And finally we have the short link redirection website which ensures that http://link.improve.dk/* redirects to the URL that’s behind it.
The database
For storing the short links I’m using a MS SQL server database, of course you can use any kind of storage you want, whether that be Access, XML or some other format. The table I’ll be using can be seen here:
We have an identity column, the URL, a column reprensenting the creation time of the link, the IP of the creator (for abuse checking) and finally a simple counter that counts how many times the link has been visited.
The “Create a short link webservice” – ShortLinkService
I’ll dive right into it and present the complete code for the webservice, ShortLinkService.cs:
using System.Web.Services;
using System.Data.SqlClient;
using System.Data;
using System.Web;
using System;
using System.Text.RegularExpressions;
[WebService(Namespace = "http://link.improve.dk")]
[WebServiceBinding(ConformsTo = WsiProfiles.BasicProfile1_1)]
publicclass ShortLinkService : WebService
{
[WebMethod]
publicstringCreateShortLinkFromURL(string url)
{
// We won't handle invalid URL'sif (!Regex.IsMatch(url, @"[-w.]+://([-w.]+)+(:d+)?(:w+)?(@d+)?(@w+)?([-w.]+)(/([w/_.]*(?S+)?)?)?"))
return"BAD URL";
// Create a SqlCommand that'll lookup the URL to see if it already exists
SqlCommand cmd = new SqlCommand("SELECT LinkID FROM tblShortLinks WHERE URL = @URL");
cmd.Parameters.Add("@URL", SqlDbType.VarChar, 512).Value = url;
object result = DB.GetScalar(cmd);
// If it exists, just return the existing short linkif (result != null)
return"http://link.improve.dk/" + result;
else
{
// Since it doesn't exist, create it and return the new link
cmd = new SqlCommand("INSERT INTO tblShortLinks (URL, IP) VALUES (@URL, @IP); SELECT @@IDENTITY");
cmd.Parameters.Add("@URL", SqlDbType.VarChar, 512).Value = url;
cmd.Parameters.Add("@IP", SqlDbType.VarChar, 50).Value = HttpContext.Current.Request.UserHostAddress;
return"http://link.improve.dk/" + Convert.ToInt32(DB.GetScalar(cmd));
}
}
}
First of all we have to make a crude check to see if it’s a valid URL, if not, we won’t handle it. Next we’ll try and see if the requested URL already exists as a short link. If it does we might as well just return that instead of creating a new one.
Please don’t get confused by my call to another class that I use (which I won’t be presenting): DB.GetScalar(). What DB.GetScalar() does is to simply connect to my database and run the SqlCommand on it, returning the scalar value of the query. I’ve kept this code separate as it would only clutter the real purpose of this code.
After getting the value of the SQL query we check if the link exists. If it does we return the short link URL, if not, we create the short link while selecting the newly created identity value at the same time. And then finally we return the URL, just as if it already existed.
That was the complete short link webservice code. All it does is to simply take a URL and return a corresponding short url.
The redirector website
This is the website running at http://link.improve.dk. I’ve setup wildcard mapping so all requests passes through to the ASPNET engine. This enables me to write the redirection functionality in the Global.asax file like so:
using System.Web;
using System;
using System.Text.RegularExpressions;
using System.Data.SqlClient;
using System.Data;
publicclass Global : HttpApplication
{
privatevoidApplication_BeginRequest(object sender, EventArgs e)
{
string input = Request.Path.Replace("/", "");
// Let's do a simple validation, the input has to be a numberif (!Regex.IsMatch(input, @"^d+$"))
DB.Debug("Not a valid short link.");
int linkID = Convert.ToInt32(input);
// Lookup URL in database
SqlCommand cmd = new SqlCommand("UPDATE tblShortLinks SET Visits = Visits + 1 WHERE LinkID = @LinkID; SELECT URL FROM tblShortLinks WHERE LinkID = @LinkID");
cmd.Parameters.Add("@LinkID", SqlDbType.Int).Value = linkID;
object url = DB.GetScalar(cmd);
if (url != null)
Response.Redirect(url.ToString());
else
DB.Debug("Link does not exist.");
}
}
First of all we retrieve the input value which consists of the requested path - exluding the leading forward slash. Then we perform a very quick input validation, checking that the requested path is a number. Most short link services use a combination of numbers and alphanumeric characters to keep the actual URL as short as possible. While this is a much better solution, I’ve stuck to the simple version by simple using numbers.
After retrieving the link ID from the requested path, we look it up in the database - and incrementing the visits count at the same time. If it exists then we perform a Response.Redirect to the requested URL, if it doesn’t exist then we write an error output.
The DB.Debug() function is very simple. All it does is to perform a Response.Write() of the passed object and then a Response.End() afterwards, very retro debugging stylish. This concludes the complete short link redirection website.
The managed clientside library – ShortLinkClient
This is where things start to get interesting. This library is the .NET class that’ll take care of communicating with the ShortLinkService webservice from the client computer. The ShortLinkClient library will be invoked from the Internet Explorer addin through COM (as we have to use JavaScript for the actual addin, unfortunately).
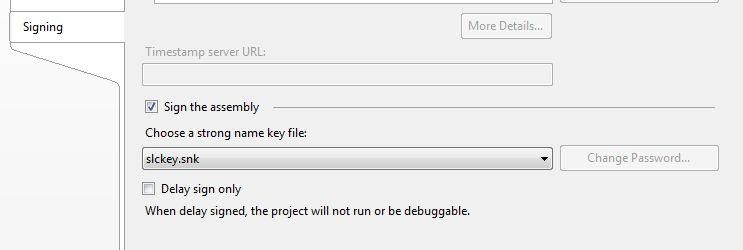
Start by creating a new class library project. Now either delete the Class1.cs or rename it to your liking. Then add a web reference to the following web service:http://linkservice.improve.dk/ShortLinkService.asmx. As this library has to be exported to COM we have to sign it using a strong name key file. Fortunately this is quite simple in Visual Studio 2005:
Simply right click the ShortLinkClient project and select properties. Then go to the Signing tab, check “Sign the assembly” and choose “New…” from the dropdown list. This’ll create a new strong name key file for the library. You do not have to password protect it.
Make sure the ShortLinkClient.cs code matches the following:
By default our .NET classes are not visible to COM when it’s exported, that why we have to set the [ComVisible(true)] attribute on the ShortLinkClient class. Also, for our class to be usable by COM, we have to create a constructor that takes no parameters, otherwise COM won’t be able to use our class.
The IsLink function is used to determine whether the right clicked text is actually a valid URL or if it’s just plain text.
CreateShortLink takes the URL as a parameter. It then creates an instance of our ShortLinkService proxy class whereafter it invokes the CreateShortLinkFromURL function of the webservice which should return the short link equivalence of the passed URL. This is the only managed code that will run on the client as part of the Internet Explorer addin.
After building the ShortLinkClient project, register it for COM interop using the following command from a command prompt:
regasm /codebase ShortLinkClient.dll
To unregister, simply switch the /codebase switch with /unregister. You may have to close any open Internet Explorer windows in case the library has been invoked through the addin as these windows otherwise may lock the dll file.
Creating the actual addin
Unfortunately Internet Explorer lacks a bit when it comes to creating add ins for the context menu. I’d really like to be able to write in managed code all the way, but as things are currently, this part has to be written in JavaScript.
To register the addin, create a new registry key in the following location: HKEY_CURRENT_USER/Software/Microsoft/Internet Explorer/MenuExt. The key should have the name that you want to be present in the context menu. In my case that’d result in the following key being created: “HKEY_CURRENT_USER/Software/Microsoft/Internet Explorer/MenuExt/Replace with short link”.
The default value should point to the location where you want your javascript file to be located. For development purposes you can place this anywhere you want (I’m using the desktop). For deployment you might want to consider using the Program Files folder.
<script type="text/javascript">
// <![CDATA[functionmain()
{// Get document referencevar doc = external.menuArguments.document;
var range = doc.selection.createRange();
// Check if any text has been selectedif(!range.text)
{
alert('No text selected.');
return;
}
// Create the ShortLinkClient objectvar shortLinkClient = new ActiveXObject('Improve.ShortLinkClient');
// If link starts with www, let's add http:// for conveniencevar link = range.text.indexOf('www') == 0 ? 'http://' + range.text : range.text;
// Check if selected text is actually a URLif(!shortLinkClient.IsLink(link))
{
alert('Selected text is not a valid URL.');
return;
}
// Get a short linkvar shortLink = shortLinkClient.CreateShortLink(link);
// Replace the selected text with the short link
range.text = shortLink;
}
main();
// ]]>
</script>
The JavaScript file contains absolutely standard JavaScript code inside a normal script element. In the main function we can access the relevant html Document by accessing the external.menuArguments.document property. We can retrieve the selected text by creating a range using the Document.selection.createRange() function.
First we have to check whether any text was selected at all. Then we create an instance of the ShortLinkClient library (remember, it’ll have to be registered for COM interop for this to work - using regasm).
For convenience I’ll add http:// in case the link starts with www. For it to be a valid link it has to be in the form protocol://*, so by adding the http:// I’ll allow users to shortlink links like “www.improve.dk” instead of them having to type the complete http://www.improve.dk.
Next we check whether the selected text is a link by using the ShortLinkClient.IsLink() function, passing in the selected text. If everything passes thus far, we invoke the ShortLinkClient.CreateShortLink() function which’ll invoke the webservice and create the short link - and return the short link URL which we will the use the replace the selected text with in the last line of the main function.
If all goes well, this should be the result of our four components working together:
Many features of this example can be improved if this was meant to be deployed for real. For instance the regular expressions may not match all valid URL’s. Also we should probably make some kind of “loading” text while the webservice creates the short link, instead of letting the user sit there for a second or two before the short link emerges (the first time it’s called it’ll take some time, afterwards it should be nearly instant).
Please let me know if you have any suggestions, questions or any other relevant comments, thanks!
Update: As noted in the comments, this method does not actually round, it truncates the datetime value.
As feature complete as MS SQL Server may be, it really lacks some simple datetime rounding functions. Here is a simple trick to easily round of datetimes at any precision you wish.
We will be using two builtin functions, namely the DATEADD and the DATEDIFF function.
We can round off at nearly any precision that SQL Server itself supports, for instance: Minute, Day, Hour, Day, Month, Year and so forth.
In this example I’ll select the original “Created” column from the table tblHits, as well as a rounding of the Created column by the day:
SELECT Created,
	DATEADD(Day, DATEDIFF(Day, 0, Created), 0) AS CreatedDay
FROM tblHits
It’ll return the following original / rounded values:
You could of course also do the rounding on the webserver after you’ve selected the database results. Sometimes though, we have to do it at the database level. For instance, if I want to know how many visitors I have per day on my blog:
Now, I know that this is not optimal in terms of performance since we’re doing the DATEADD(DATEDIFF()) trick twice to both select it and group by it, but I’ve kept it this way to follow the KISS principle.
Upgrading to IIS 7 should be rather transparent, unfortunately that is not the case when it comes to URL rewriting as we knew it from IIS 6. In IIS 6 all we had to do was to add a wildcard mapping making sure that all requests went through the ASPNET ISAPI process. After this was done, one could create a global.asax file that would either pass requests directly through or rewrite the URL based on an internal algorithm.
UPDATE: Please see my updated post on how to do proper URL rewriting using IIS 7.
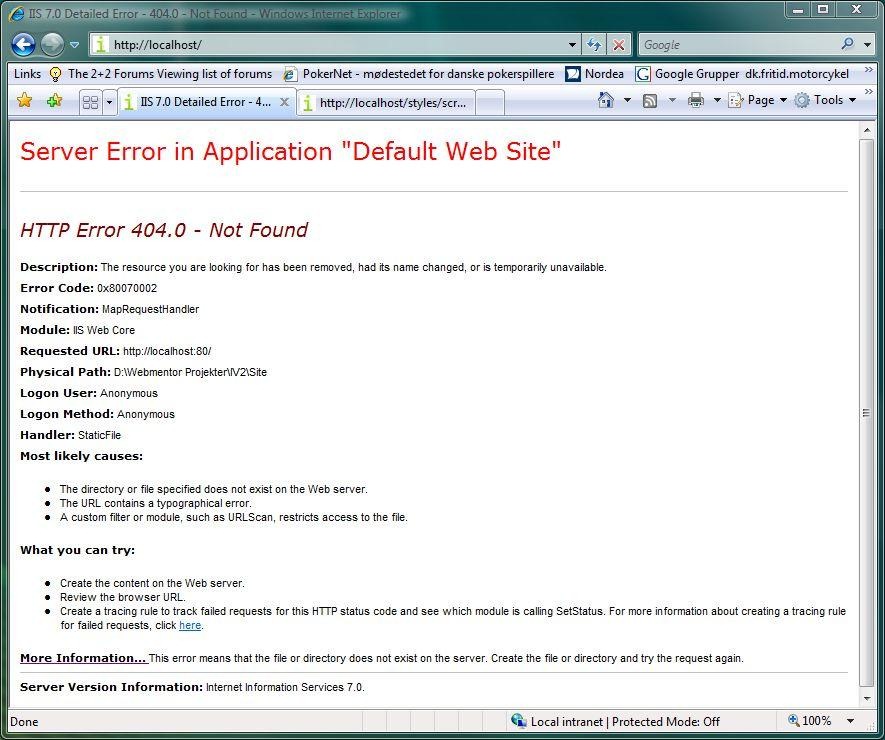
I didn’t really expect this to be a problem when I first requested http://localhost for the first time after setting up my site on IIS 7 (all default settings).
Unfortunately this was what I was presented with. Anyone having worked with wildcard mappings from IIS 6 will recognize this, this is the result you’ll get after adding a wildcard mapping without having created your URL rewriting functionality. After adding a wildcard map the IIS will not automatically find a default file (by design).
This however, is not the problem cause here. I already have my URL rewriting functionality written in my global.asax BeginRequest method and I’d really like to just reuse my current code. Although the new IIS has a whole new bunch of features - one of them being a new “more correct” way of doing URL rewriting -, I really just wan’t to get my website up and running again so I can continue my work.
What I present below is a quick’n’dirty hack that will get my old URL rewriting code to work again. It may not be the IIS 7 way of doing it, and it may not work in your case, it depends on the type of URL mapping you’re doing in your project. In short, YMMV.
My scenario
For this website, improve.dk, all URL’s except static files are requested as though they were folders. That means you will not see any pages ending in anything but a /. Any static files are requested as usual. That means I can be sure that a regular expression like . will catch all static files, while * will catch all pages - as well as the static files!
How I got URL rewriting to work like IIS 6
Start by opening the IIS Manager and selecting your website.
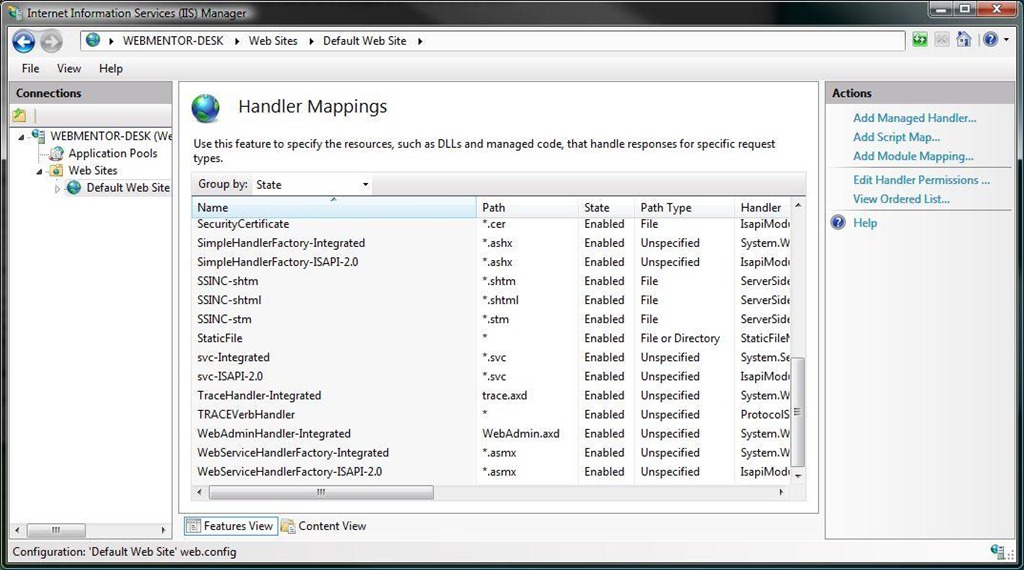
Now enter the “Handler Mappings” section:
Notice the “StaticFile” handler. Currently it’s set to match and catch both File and Directory requests. If you look back at the first image, you’ll notice that the error message details that the handler causing the 404 error is the StaticFile handler. As I know that all my static files will have a file extension (also I don’t care for directory browsing), I’ll simply change my StaticFile handler so it only matches .* - and only files.
Your StaticFile handler should now look like this:
Now, if you go back and make a request to http://localhost you’ll still get the 404 error, but this time the request is not handled by the StaticFile handler, actually it doesn’t get handled by any handler at all:
What needs to be done now is that we need to map any and all requests to the aspnet_isapi.dll isapi file - just like we would usually do in IIS 6.
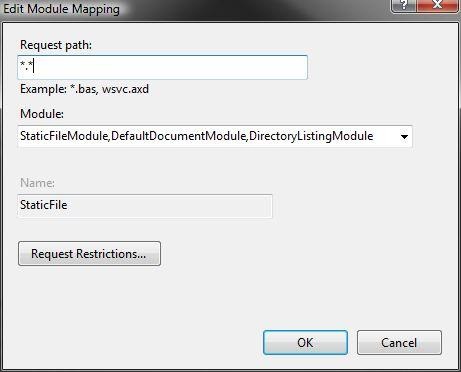
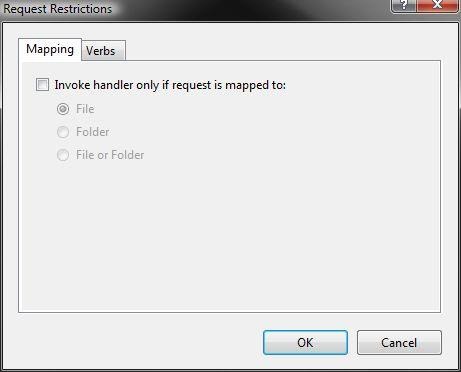
Add a new Script Map to the list of Handler Mappings and set it up like this:
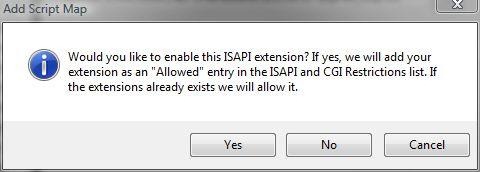
Click OK and click Yes at the confirmation dialog:
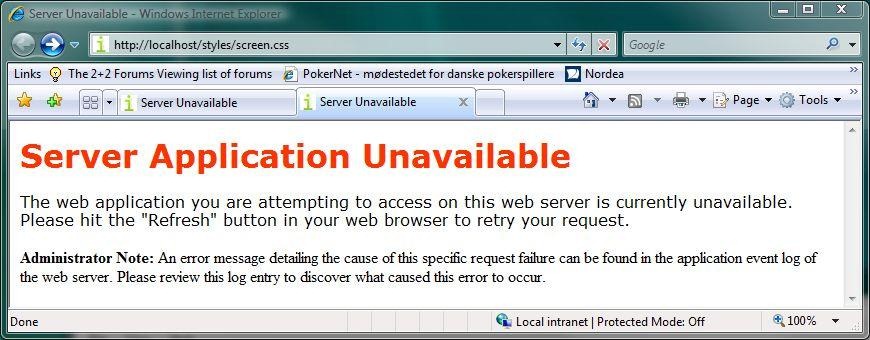
Now if you make a request to either http://localhost or any other file you’ll get the following error:
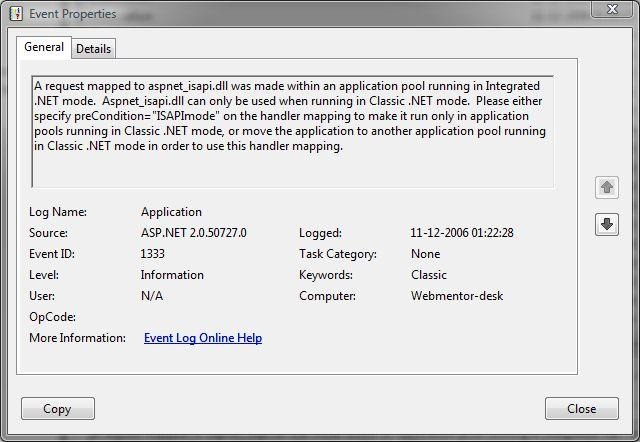
Looking throug the Event log reveals the cause of the error:
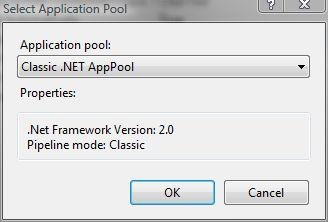
The aspnet_isapi.dll file cannot be used as a Handler for websites running in the new IIS 7 Integrated Mode, thus we will need to make our website run in classic .NET mode. Right click your website node in the IIS Manager and select Advanced Settings. Select the “Classic .NET AppPool” and close the dialog boxes:
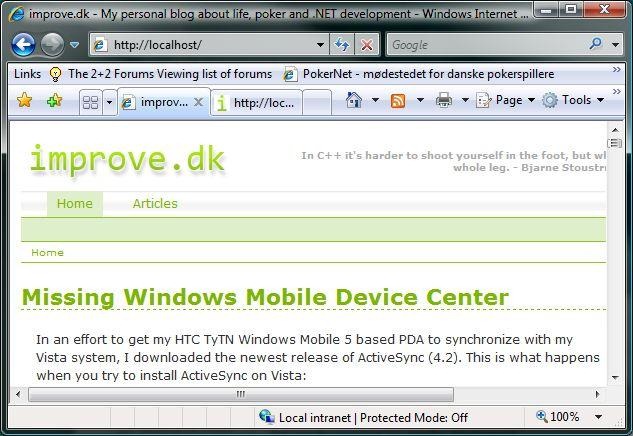
Now you should be able to make a request to http://localhost and see it work. Your URL rewriting should work as a charm aswell:
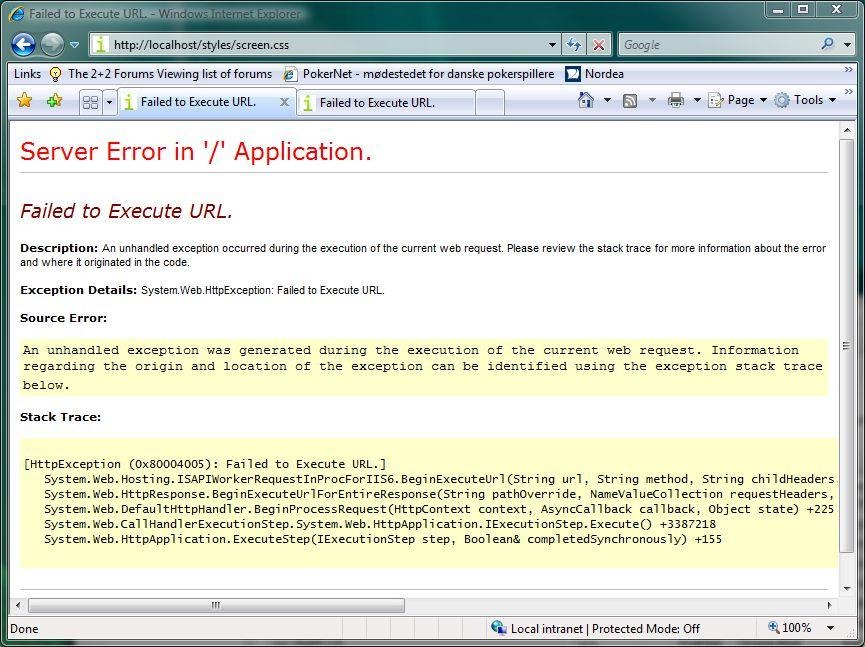
But obviously somethings wrong. Making a request to any static file will reveal the problem:
“Failed to Execute URL”, what a great descriptive error. Fortunately you won’t have to spend hours ripping out hair… As I have already done that - at least I’ll save a trip or two to the barber.
The problem is that the static files are being processed by the aspnet_isapi.dll file instead of simply sending the request along to the StaticFile handler. If you click the “View Ordered List…” link in the IIS Manager from the Handler Mappings view, you’ll see the order in which the handlers are being executed for each request:
When you add a new Script Map it’ll automatically get placed at the very top of the line taking precedence over any other handlers, including the StaticFile one.
What we have to do is to move our Wildcard handler to the very bottom, below the StaticFile handler. By letting the StaticFile handler have precedence over our Wildcard handler we ensure that any static files (matching .) gets processed correctly while any other URL’s gets passed along to our own Wildcard handler that’ll do the URL rewriting and make business work as usual:
After doing so, both static files as well as your custom URL’s should execute as they would under IIS 6:
Disclaimer
Please notice that this is a hack. This is not the way URL rewriting is supposed to be done under IIS 7. But instead of spending hours upon hours investigating how to do it the right way, this is quick fix to make things work like they did before.
Also please note that this solution is intended to work for my specific situation. Your needs for URL rewriting may not necessarily match mine, so you may have to modify certain settings to suit your specific needs.
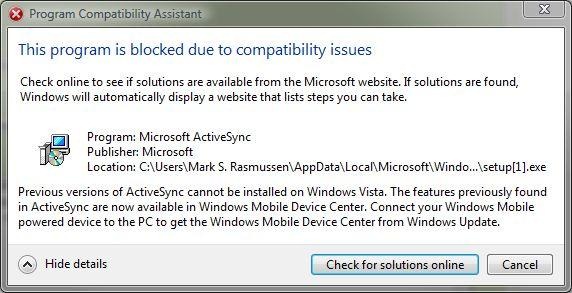
In an effort to get my HTC TyTN Windows Mobile 5 based PDA to synchronize with my Vista system, I downloaded the newest release of ActiveSync (4.2). This is what happens when you try to install ActiveSync on Vista:
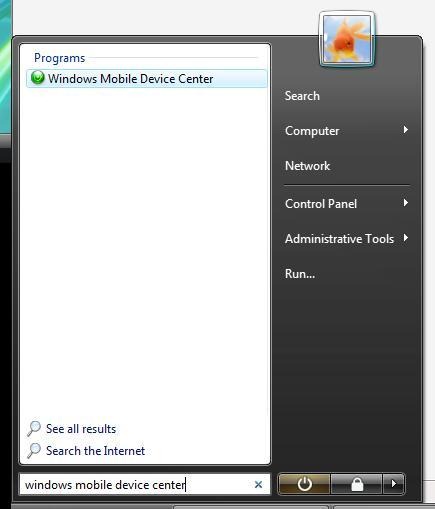
After searching for a solution it became apparent that Vista was born with the successor of ActiveSync, namely the Windows Mobile Device Center (WMDC in short, which is not to be mistaken for the Weapons of Mass Destruction Commission, which shares the same acronym).
And whadda ya know, there it is, Windows Mobile Device Center. It really does come preinstalled, neat.
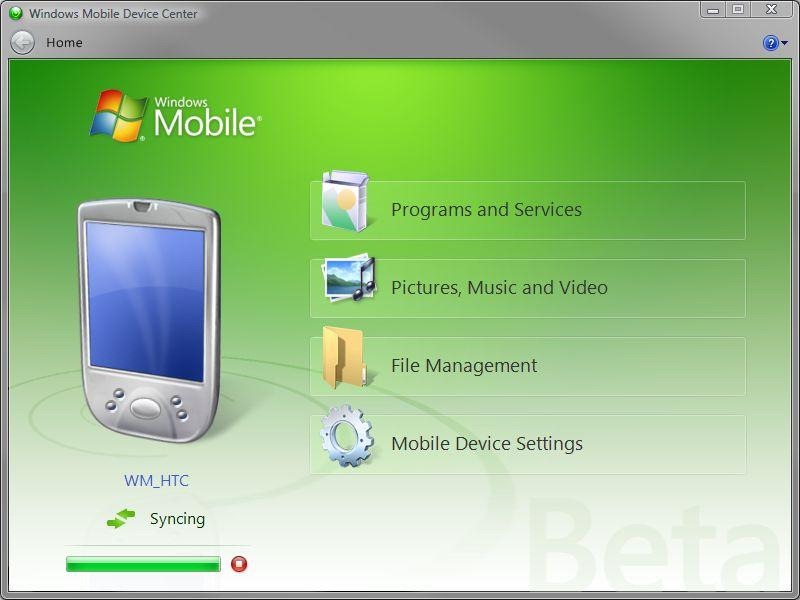
But… If it’s pre installed, why is this all I get when I run the WMDC? Apparently it’s perfectly able to recognize that my device is connected.
And furthermore it’s also able to recognize the name of the device, as well as the operating system, PPC 5.1 / Windows Mobile 5. But why is it not able to synchronize then?
For some reason the Windows Mobile Device Center is NOT preinstalled after all, or at least the actual Device Center isn’t, only the connectivity parts are. To use the Windows Mobile Device Center you’ll have to download the Beta 3 version of WMDC and install it.
After installing the Beta 3 version of WMDC it runs perfectly. It really seems to be a lot more snappy and intuitive than the old ActiveSync.
Ok, so I’d promised myself that I would at least give it a month before I’d install Vista on my desktop computer as I simply will not be able to cope with having major problems here. For work purposes I simply have to have a functional desktop computer.
Oh to heck with that! Having tried Vista on my laptop, I craved for seeing it expose it’s full potential on a more capable machine. I fell into the pressure. I did it. I installed Vista on my desktop.
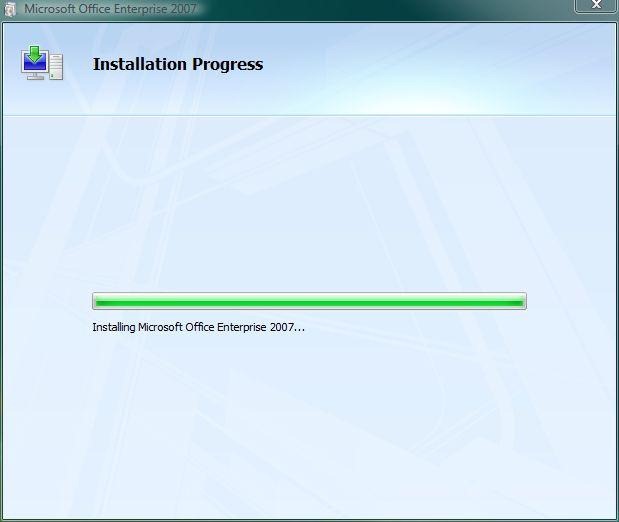
I’ve blogged the whole process, moving from the usual XP environment to Vista, all the new features, annoyances, problems and so forth. I won’t be blogging about all of it as there’s simply too much, instead I’ll be releasing an article shortly describing the whole process. For now, I’ll stick to a problem I had when I tried to install Office 2007 on the newly installed Vista machine (a problem which Google couldn’t remedy). It was an absolutely fresh install on a formatted drive, all that I’d installed so far were some device drivers. Barring this, Office 2007 should install without a hitch right? Guess not.
I started the installation without problems, chose my setup configuration and began the actual installation. After about 6-7 minutes it was at the end of the installation according to the process bar. An hour later it was still at the end of the process bar without anything visibly happening. I checked the task manager, it was constantly using 10-15% CPU. I gave it another hour as I had to go eat anyways.
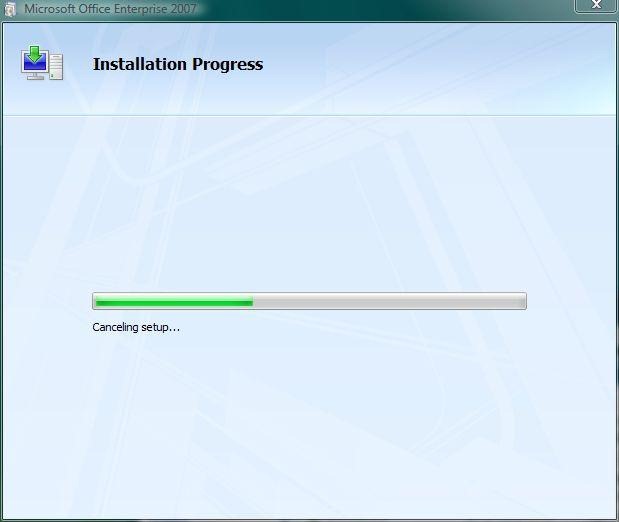
After the second hour it had still not moved anywhere, I’d guess you can call it dead by now. I cancelled the setup (by clicking the red X), but this time it hung again, halfways in the uninstall. Half an hour later I killed the process as nothing was happening.
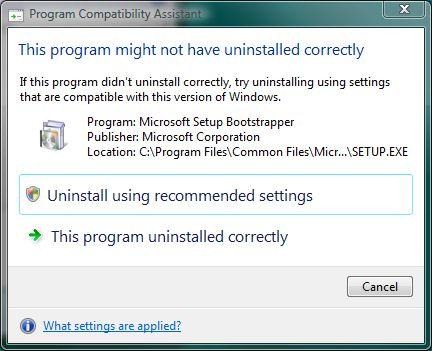
Then this friendly fella popped up, teling me that the uninstallation probably didn’t go as planned, well woope de doo. Clicking “Uninstall using recommended settings” performed the uninstall without problems (I seriously wonder what the “recommended” settings are, seeing as there are no settings in regards of an uninstall).
Reinitiating the Office 2007 install from the DVD resulted in this error - it gets more and more cryptic. I have sucessfully used this DVD to install Vista on Windows XP without problems, so it can’t be the DVD. I then resorted to the true swizz army knife of any software developer - a reboot.
After rebooting I initiated the install again, and what do you know, it actually went all the way through this time without any problems. Finally! Or so I thought at least.
“Failed to register a VB Script DLL. Reinstall or run Regsvr32.exe Vbscript.dll to self register. ‘C:Program FilesMicrosoft OfficeOffice12FORMS1033scdrestl.ico’ is not a valid icon file.”
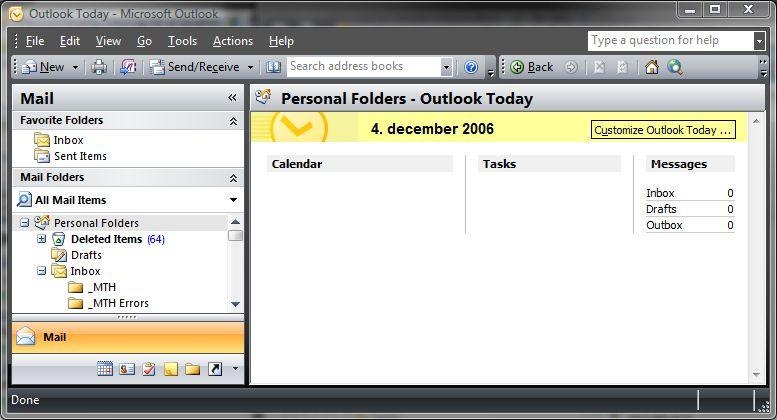
When starting up Outlook, I receive this error message (during the “Setting up accounts” initialization phase). Clicking OK (or the red X) resulted in Outlook closing down and me receiving yet another almost identical message:
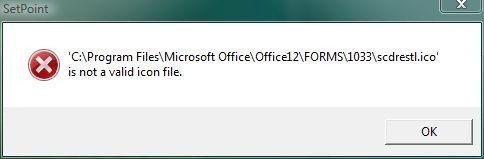
“‘C:Program FilesMicrosoft OfficeOffice12FORMS1033scdrestl.ico’ is not a valid icon file.”
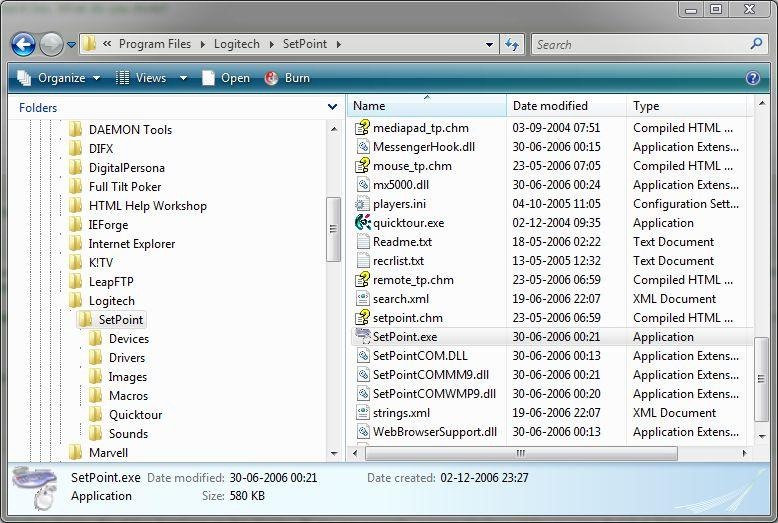
More or less the same error message, though this time the title of the dialog was “SetPoint” - the mouse/keyboard driver software for my Logitech diNovo keyboard - what the fudge?
OK, it told me to either “self register” or uninstall. As I have no idea what “self register” incorporates (I tried to regsvr32 Vbscript.dll to no avail, and I hardly think a .ico file can be regsvr32’ed), I went for the uninstall. But this all to familiar dialog box popped up. After about five reboots and several torn images of Bill Gates I realized the I was not going to get this bugger uninstalled (this dialog also appeared through the “Programs and Features” control panel when trying to uninstall from there). So what’s the next step?
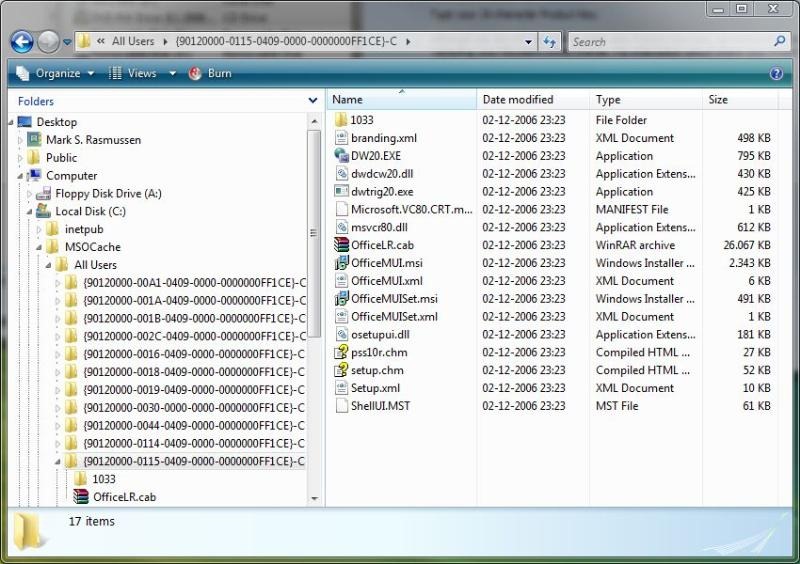
Please do not ask me how, I really can’t remember how I dug myself in here, the important thing is that I did. I tried running both .MSI files. I have no idea what they did, the just executed with no GUI and then closed again in about one second. After running these MSI’s, I was suddenly able to run the Office installer again. It acted as though Office wasn’t even installed on my system so I couldn’t uninstall. I decided to just do an install again, hopefully overwriting any buggy files that might have caused the problem.
Well, the good news is that the install went through problem free. The bad news is that the main problem persisted.
I dug out the 2KB .ICO file that seemingly was corrupt (and was able to bring down Microsoft Outlook 2007 - talk about David vs. Goliath!). Windows Photo Gallery (the Vista pendant of the XP Preview application) wasn’t able to display the ICO file. As it was able to display all of the other .ICO’s in the same folder I think it’s safe to conclude that the file was somehow damaged.
Then I took the damaged SCDRESTL.ICO file and prepended the file name with an underscore. Afterwards I simply took a copy of one of the other working .ICO files (SCDRESTS.ICO) and renamed it SCDRESTL.ICO.
Ever since IE7 came out developers have had the problem of whether they should upgrade or not. If they chose to upgrade, they wouldn’t be able to test their sites in IE6 any longer as installing IE7 would uninstall IE6. There are 3rd party hacks that allow both versions to be installed at the same time, but they will not simulate a true IE6 / IE7 environment.
In recognition of this problem, Microsoft has put out a free Virtual PC 2004 (VPC itself has also been made a free download) image containing a pre-activated Windows XP SP2 installation as well as IE6 and the IE7 readiness toolkit. The image will self destruct on the 1st of april 2007, there’ll probably be another solution out by then.
It seems Logitech has some pretty functional SetPoint drivers out for Vista already (SetPoint is the all-purpose driver software for all their keyboards and mice).
The ony thing that did not work was the volume control. I could turn it up and down and the visual volume meter would respond (the SetPoint generated one, not the Vista one), but nothing would actually happen.
Fortunately there’s an easy solution.
Navigate to “C:Program FilesLogitechSetPoint”. Now make sure that the “SetPoint.exe” process is NOT running - you may have to click Ctrl+Shift+Escape and end the process in the task manager.
Now rightclick SetPoint.exe and select “Properties”. Navigate to the Compatibility pane and set it to run in compatibility mode as Windows XP (Service Pack 2). After this, double click SetPoint.exe to restart the process. Your volume control should now work!
I am now officially running Vista! Although I have been somewhat skeptical about Vista so far, I must admit that my first impression of Vista is quite positive.
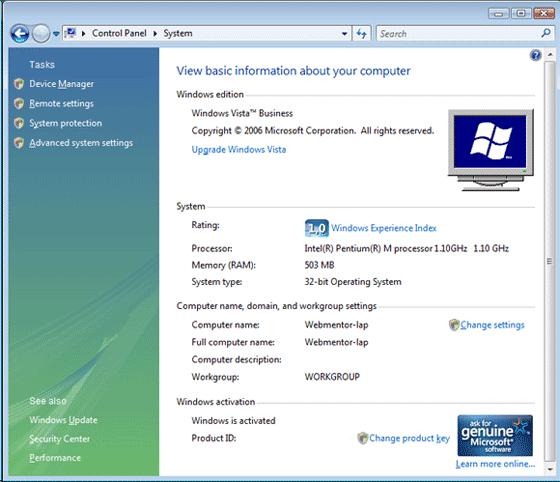
It seems that most Microsoft affiliated Vista users brag about their high System Rating scores, most of them being in the 4+ area. How about aiming at who can get the lowest score? Well say hello to my laptop:
I’ve installed Vista on my Dell Latitude X1 laptop that boasts a puny 1.1Ghz Pentium M CPU and 512MB memory, and the graphics card isn’t even worth mentioning. To my surprise Vista actually seems to run quite well on my laptop. Naturally I’m unable to run the Aero user interface as my laptop is no where capable of that, but even the non-aero user interface looks quite neat. Another plus is that Vista was able to use my sound card, wifi, bluetooth and my laptop specific function keys without me installing any drivers, very nice (in a Borat-ish voice).
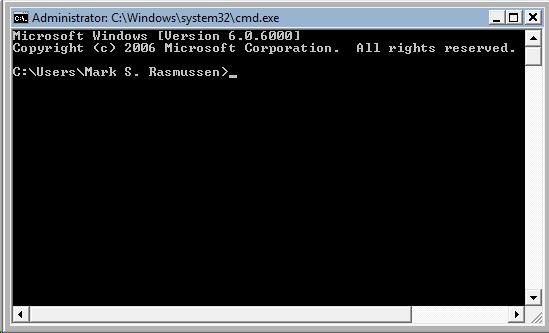
The Windows XP user interface never turned me on. In fact, the first thing I do on a new XP installation (after unplugging the network cable) is to revert the user interface back to the good old classic Windows 2000 look, ahhh, the memories. Although Vístas interface looks a lot more professional, one does get the feeling that it really is nothing more than a new user interface running on top of all the old components.
For instance, look at this command prompt that I’ve opened. It clearly shows that the Vista interface attempts to put a Vista border around the classic 2k style window, creating some sort of ugly double-border look.
If you switch back to the 2k look you get a bit disappointed. In my opinion the user interface looks very messy, there are no clear lines that indicate the various parts of the window. This isn’t just an issue with the “My Computer” window as indicated in the above picture, but in most Vista windows. Compare it to the Vista look below:
Here the “Organize, views, system properties” line is clearly marked using a gradient color, giving a much cleaner look. I know it’s probably blasfemi, but I really wished that they’d spent a bit more time making a nice 2k look as well.
It’s sad that all I’m mentioning here is the user interface, but that really is what counts on a first impression basis. I haven’t used Vista more than about an hour, so I’m going to save any indepth analysis for later on when I know what I’m talking about.
MSDNAA
It seems that Vista is already out on MSDNAA in some countries. Though there is no official date we’re hoping to have Vista out on MSDNAA in Denmark sometime in December. Vista Business will be available through MSDNAA, not Ultimate - the Media Center capabilities of Vista Ultimate includes some rather expensive codecs which cannot currently be put onto MSDNAA, I do however hope that it will be possible later on.
As a developer I strive to increase my productivity. In contrast to most people I know, I’m able to multitask at an unusual level. I often sit at my desktop, working on several projects at the same time (literally), I may also watch multiple movies/tv-series at the same time and so forth.
So how do we increase productivity? I’ll stick with the hardware/software aspect and ignore the psychological issues (which are not to be neglected, the definitely play a big part as some people just seem to be unable to multitask at any level).
The one thing that has increased my productivity the most was when I bought my my dual-monitor setup (two 20” Dells). Having dual monitors is a world of difference in contrast to having just a single monitor, no matter the size of that single monitor. I’ve had several discussions with friends who would rather have a single 24” monitor instead of two 20” or two 17-19” (there’s no real difference between 17-19” monitors as they all support the same resolution). I would any day choose two low grade 17” monitors over a single 24” monitor, simply because ones productivity is a lot greater when having dual monitors. But why?
The problem with multi tasking on a single monitor is that we tend to - and Windows is built for - have our windows maximized. Maximizing windows is great, it saves us a lot of work, moving windows around so all the open windows fit, resizing them and so forth. By maximizing them we simply have to double click the titlebar and we’re done. But that’s not all good. The problem with maximizing windows is that we can only have a single active window at a time, requiring us to alt-tab around between the windows, or even worse, moving our mouse between the start menu and the actual window content area, wasting a lot of time.
Having multiple monitors enables you to have multiple maximized windows at the same time, as maximizing a window will only maximize it on the monitor it’s currently at. You’d be surprised at how often having just two maximized windows is all you need when working. As a developer we’ll usually have Visual Studio and Internet Explorer running (for web development), or possibly VS + SQL Server Management Studio and so forth. It also gives one a much better perception of the current work task as you can have a lot of arbitrary information lying around on the secondary monitor while working on the primary monitor.
Let me talk a bit about how to optimally place your monitors.
Dual monitor setup
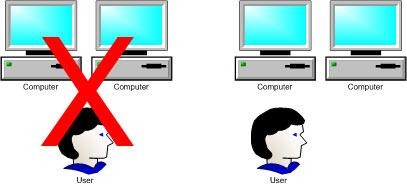
The most intuitive thing to do when setting up a dual monitor setup is to place both monitors on each side of the center point, in effect, placing you directly in between both monitors, having a great view on both of them.
This however, is not optimal! You should place yourself directly in front of one of the monitors, the primary one. You will be concentrating your focus on just one of the monitors for 90% of the time, very very rarely will you need to actually look at both monitors at the same time. Placing yourself in the middle will (although you may not be consciously aware of it) cause you to twist your neck to one side continuously. By placing the primary monitor straight ahead of you, you can sit at a normal angle for most of the time, and it feels natural to look over on the other monitor when you actually need it.
Quad monitor setup
What’s the next natural step after dual monitors? Quad monitors of course!
This was my second setup, after my dual monitor setup. Let me give you a warning right now and here, you should not get a setup like this unless you have a really explicit need for quad monitors. I loved this setup while I was setting it up, I loved it for about a week (simply because I had to, after all it wasn’t really that cheap). But the fact is that it’s utterly useless. Again, you’ll have to position the primary monitor right in front of you, but on most quad monitor stands, it’s not really possible to customize the setup very much. Also the lower monitors will simply be too low for you to look at them naturally (and the top ones will be too high), so this setup will cause you to constantly sit in a bad position, not really having any monitors feeling natural to look at.
Triple monitor setups
Before I had my quad setup, I had three of those 20” Dell’s. That was actually a quite good setup, and that’s what I’m going to describe here. Unfortunately you’ll have to do with a picture of my current setup (two 20”‘s with a center 30”) as I can’t find any pictures of my trip-20”‘s setup.
Having three monitors is a great solution if you really need a lot of monitor real estate. The obvious advantage is that there’s a center monitor that will quite naturally become the primary monitor. The two side/satellite monitors will become secondary monitors where you’ll keep all the arbitrary info while working. Again, the most important factor here is that you’ll be able to work on your primary monitor while looking at a an angle that feels natural.
Required hardware
Most people think it requires a lot of expensive hardware to run multiple monitors - that’s a myth! Most graphics cards today actually come with dual monitor outputs. It doesn’t matter if ones VGA and the other’s a DVI output, as long as you’re able to connect your monitors, it’ll work. If you’re going to buy a new graphics card, please do yourself a favor and get one with DVI outputs as it delivers a better picture on TFT’s.
As for monitors, you really should get yourself monitors that support the same height resolution. It’s a pain when you can’t move your mouse clearly from one monitor to the other since the resolution doesn’t allow you to do so.
Software
Windows is great at automatically setting up your x-monitor system. It’ll automatically recognize the monitors and stretch your desktop across all monitors. You don’t need any 3rd party software to run multiple monitors.
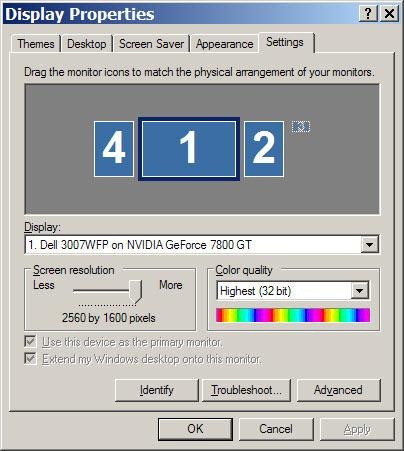
In the usual display properties control panel, you’ll be able to arrange your monitors and setup how they should behave when you move your mouse from one monitor to the other. If the physical left monitor appears to be on the right side of your center monitor, simply switch them around here.
You should note that there essentially three different multi monitor modes (I’ll be using nVidia terms as that’s what I’m using).
DualView makes each monitor act as an individual monitor, that means you’ll be able to maximize windows on that monitor and make it behave as a stand alone monitor.
Clone does what the name implies, it simply clones the contents of your primary monitor onto your secondary monitor.
Horizontal span will combine all of your monitors to one giant monitor. It’s highly unusable as maximizing a window will cause it to be maximized across all monitors - which isn’t really that useful as you’ll probably have some space between the displays, causing an interruption in the middle of your favorite application.
UltraMon
While you don’t need any 3rd party software to run multiple monitors, you’re going to need some to do it effectively! When you connect multiple monitors to Windows, it’ll only show your taskbar on the primary monitor, and it’s a pain in the ass to move your mouse all the way from the secondary monitor to the primary monitor, just to switch applications. UltraMon will put a taskbar on all of your monitors. The UltraMon taskbar works just like the Windows one, it’ll only show the windows that are currently on that particular monitor. Also UltraMon enables you to setup keyboard shortcuts for moving a window from one monitor to another, I use Ctrl+Alt+Shift+Left/Right for moving a window to the previous/next monitor. UltraMon does a lot more, but these are the most important features. Oh yeah, it also enables you to make multi monitor wallpapers:
There’s a free alternative to UltraMon, MultiMon. While in my experience MultiMon did not work as stable and feature complete as UltraMon, it’s great if you don’t wanna spend the $39. Click here to go the the MultiMon website.
allSnap
allSnap makes all your window snap to the edges of your monitor(s), it may also snap to other windows, it can be customized to any way you like. allSnap is great when you have to have several windows open on one monitor, it makes it a lot quicker for you to resize the windows so you utilize your full monitor area.Click here to go the the allSnap website.