Once you start receiving visitors from all over the world, a new kind of scaling issue arise. It’s not a matter of adding more servers to the cluster or optimizing code (we’ll assume these factors are perfect), it’s a simple matter of geography and mathematics. Serving code from one end of the world to the other will take time, no matter how quick your servers are handling the request. The speed of light suddenly seems quite slow.
At one of my current projects we serve a lot of image data. Letting US based clients fetch all the data from Denmark results in very slow response times. The obvious solution is to partner up with a CDN provider, problem solved. While this may solve the problem, it’ll also cost you a bit as CDN providers, rightfully, are not cheap. If you don’t need the amount of PoPs that the CDN provides, you can setup your own service quite easily using Squid.
The scenario
We want to setup Squid as a reverse proxy. By utilizing a reverse proxy setup, we can use the Squid server with minimal changes to our current configuration. This is very case dependent however - it’ll not be optimal for non-cacheable resources like personalized pages, shortlived data and so forth. In our case we have non-expiring static images with static urls - the perfect case for a reverse proxy setup. Squid will comply completely with the cache properties set by the HTTP headers of your requests, so make sure you’ve got them under control in your solution. In our case, images are served with a lifetime of a year and a static etagwhich’ll ensure Squid won’t purge them unless it’s running short on disk space. So just to summarize this would be the typical scenario for a US based client visiting our website:
Squid has not cached data
Client: Can I please have image X?
Squid: Oh, I don’t have it, please wait while I fetch it from Denmark…
Squid: [Fetching image from Denmark, storing it on disk and caching it in memory]
Squid: There you go, here’s image x!
Squid has cached data
Client: Can I please have image x?
Squid: There you go, here’s image x!
After the very first request, Squid will have cached the data and thus all further requests will be served directly from the Squid server location in the US, instead of the client having to go all the way to Denmark. This is basically what a reverse proxy CDN setup does, except it’ll have a lot more PoPs all around the world, and several in the US alone probably.
Installing Squid
So how do we get this working? In this example I’ll be setting up a Squid server on a local VPC that’ll act as a reverse proxy for my website, www.improve.dk. In effect, this will mean that all cacheable resources will be served locally on my computer, while non-cacheable resources will be transparently fetched from improve.dk directly. To avoid overriding the improve.dk domain completely, I’ll set it up to listen on cache.improve.dk and forward the requests to improve.dk instead. To enabled this, I’ve added a line in my hosts file pointing cache.improve.dk to my local VPC running Squid.
Start by obtaining a binary release of Squid. I’ll be using the latest stable release, standard 2.7.STABLE4.
Squid does not require installation as such, simply unzip it where you wish. To make it simple, I’ll install Squid directly in C:squid as the standard Squid configuration expects it to be installed here - it’s easy to change though!.
We’ll start by installing Squid as a service, before doing the actual configuration. Open a command prompt and go to C:squidsbin. Now run “squid -i -n Squid”. This will install Squid as a service under the name “Squid”.
C:\squid\sbin>squid -i -n Squid
Registry stored HKLMSOFTWAREGNUSquid2.6SquidConfigFile value c:/squid/etc/squid.conf
Squid Cache version 2.7.STABLE4 for i686-pc-winnt
installed successfully as Squid Windows System Service.
To run, start it from the Services Applet of Control Panel.
Don't forget to edit squid.conf before starting it.
Configuring Squid
Before we start Squid, we have to configure it. Go to C:squidetc and make a copy of squid.conf.default and call it squid.conf. Do the same for mime.conf.default (we won’t change this one, but it’s needed). There are hundreds of configuration options, all very well documented. Now, I won’t go over all the options, so simply delete the entire contents of the squid.conf file, we’ll add only the configuration options that we need.
Add the following lines:
acl all src all
acl manager proto cache_object
acl port80 port 80
acl domains url_regex .cache.improve.dk/
The above lines define our acl’s which are used to specify what is allowed and what is not allowed. The first line is used as a catch-all that matches everything. The second line matches a special management interface that we will not be used (and thus might as well deny access to). The third line matches port80. The fourth line defines a regular expression that is used to define what addresses are allowed to be requested. It is very important to define the allowed URLs as your proxy might otherwise be used for any service basically.
Add the following lines:
# DENY CACHEMGR
http_access deny manager

# Deny requests to unknown ports
http_access deny !port80

# ALLOWED DOMAINS
http_access allow domains

# And finally deny all other access to this proxy
http_access deny all

# DENY ALL ICP
icp_access deny all

# HTTP PORT
http_port 80 transparent allow-direct
The acl lines simply specify the match cases, not what is actually allowed and denied. Here we start out by denying access to the management interface and denying access to anything but port 80. Then we allow access to only the specified domains in the regex - and afterwards deny access to everything else by saying “http_access deny all”. We also deny ICP traffic as this is only used in a clustered Squid setup for intersquid chat. Finally we allow transparent direct access to the origin server (the actual www.improve.dk server) on port 80.
Add the following lines:
# Memory
cache_mem 64 MB
maximum_object_size_in_memory 2048 KB

# Cache directory
cache_dir ufs c:/SQUID_CACHE 204800 16 256
Here we set the memory limits for Squid. Note that this is not the total memory limit for Squid, only the limit for hot objects in transit (please see the Squid documentation for complete explanation). We also define that any objects over 2MB should not be stored in memory. Our performance really comes from serving small files directly from memory, instead of storing one PDF at 200MBs in memory. Besides storing the files in memory, Squid also stores them on disk. In the cache_dir line we setup the directory for the disk cache, as well as the max disk size in MBs (200GB in my case). The other options should be left at default (see docs).
Add the following lines:
# Logging
access_log c:/SQUID_LOGS/access.log squid
cache_log c:/SQUID_LOGS/cache.log
cache_store_log c:/SQUID_LOGS/store.log
pid_filename c:/SQUID_LOGS/squid.pid
logfile_rotate 100
This defines the location of the Squid log files. It’ll log all cache requests as well as all disk storage activity. You can customize the log format as well (see docs). The logfile_rotate setting defines how many rotations of log files we’ll use as a max. Each time we do a rotation, the old logfiles are left behind, while a new set of files are created with the rotation number appended. When the rotation has reached 100, it’ll start over from number 0 and overwrite/recreate old log files.
Add the following lines:
# Url rewriting
url_rewrite_program C:/squid/etc/scripts/SquidRewriter.exe
url_rewrite_children 5

# Objects without an explicit expiry date will never be considered fresh
refresh_pattern . 0 0% 0

# Remove all proxy headers
header_access X-Cache deny all
header_access X-Cache-Lookup deny all
header_access Via deny all

# ALLOW DIRECT
always_direct allow all
These are the final configuration lines. Ignore the url_rewrite lines for now, I’ll get back to them in just a sec. The refresh_pattern setting is very scenario dependent, it defines the lifetime of objects that do not have an explicit expiry date sent along. As my cache is only intended for static files, any files not having an expiry time should never be cached, and thus I’ve set the lifetime to 0. The header sections basically remove any extra headers normally appended by Squid / any proxy. The final line simply says that all requests (if needed) should be forwarded directly to the origin server, and not ask other servers in the cluster for the data.
Creating a .NET url rewriter
Whenever a request is made for the proxy, it’ll be in the form cache.improve.dk/file. cache.improve.dk doesn’t really exist, and the website doesn’t answer to it, so while Squid receives a request for cache.improve.dk, it should map it back to improve.dk. You could do this by configuration, but that’s no fun (in my case I had to do this for hundreds of domains, so it wasn’t feasibly to do by configuration).
Luckily Squid provides an easy interface for creating custom rewriters, log & storage daemons and so forth. Each time a request comes in Squid will write the url to stdin for the url rewriting daemon and it’ll expect the rewritten url to be output to stdout. It’ll also include some extra whitespace-separated options, but they can simply be ignored, just as Squid will also ignore anything after the first whitespace of the stdout output.
To do the job, I’ve made an über simple console application that does the job:
using System;

namespace SquidRewriter
{
	class Program
	{
		static void Main(string[] args)
		{
			while (true)
			{
				string input = Console.ReadLine();

				if (input == null || input.Length == 0)
					return;

				Console.WriteLine(input.Replace("cache.improve.dk", "improve.dk"));
			}
		}
	}
}
We need the null check as when Squid closes the process we’ll get a nullref exception otherwise. Now simply copy the app into C:squidetcscripts and Squid will automatically start it up as a child processes (or several, depending on the configuration - 5 in our case). This simple rewriter can of course be written in any language that can talk to stdin & stdout, that be C[++], Python, F#, you name it.
Starting Squid
Before we can start Squid, we need to create the swap directories. These are the directories in which Squid stores the cached data. Creating the swap directories is a one-time procedure that has to be done before Squid is started for the first time. Do this by running C:squidsbinsquid.exe -z. If you encounter any problems when starting squid, refer to the C:SQUID_LOGScache.log file to see what went wrong.
Once you start Squid (from the Services administration), you’ll notice that it starts the squid.exe process, as well as a number of SquidRewriter.exe processes.

If you open a browser and go to cache.improve.dk, you’ll see the normal improve.dk website. The only difference is that the website is now ported through our locally running Squid. You can confirm this by looking at the C:SQUID_LOGSaccess.log file:
1223221967.146   4146 192.168.0.11 TCP_MISS/200 24172 GET http://cache.improve.dk/ - DIRECT/89.221.162.250 text/html
1223221967.917    861 192.168.0.11 TCP_MISS/200 476 GET http://cache.improve.dk/styles/print.css - DIRECT/89.221.162.250 text/css
1223221967.917    861 192.168.0.11 TCP_MISS/200 549 GET http://cache.improve.dk/scripts/general.js - DIRECT/89.221.162.250 application/x-javascript
1223221967.957    901 192.168.0.11 TCP_MISS/200 6273 GET http://cache.improve.dk/styles/screen.css - DIRECT/89.221.162.250 text/css
1223221968.598    621 192.168.0.11 TCP_MISS/200 695 GET http://cache.improve.dk/images/bg.gif - DIRECT/89.221.162.250 image/gif
1223221968.608    631 192.168.0.11 TCP_MISS/200 4724 GET http://cache.improve.dk/images/logos/top.gif - DIRECT/89.221.162.250 image/gif
1223221968.978    961 192.168.0.11 TCP_MISS/200 586 GET http://cache.improve.dk/images/interface/topmenu/topbg.gif - DIRECT/89.221.162.250 image/gif
1223221972.243   1222 192.168.0.11 TCP_MISS/200 24117 GET http://cache.improve.dk/ - DIRECT/89.221.162.250 text/html
1223221972.253     50 192.168.0.11 TCP_REFRESH_HIT/304 292 GET http://cache.improve.dk/styles/screen.css - DIRECT/89.221.162.250 -
1223221972.263     50 192.168.0.11 TCP_REFRESH_HIT/304 289 GET http://cache.improve.dk/styles/print.css - DIRECT/89.221.162.250 -
1223221972.263     50 192.168.0.11 TCP_REFRESH_HIT/304 292 GET http://cache.improve.dk/scripts/general.js - DIRECT/89.221.162.250 -
1223221972.283     20 192.168.0.11 TCP_REFRESH_HIT/304 287 GET http://cache.improve.dk/images/bg.gif - DIRECT/89.221.162.250 -
1223221972.293     30 192.168.0.11 TCP_REFRESH_HIT/304 293 GET http://cache.improve.dk/images/logos/top.gif - DIRECT/89.221.162.250 -
1223221972.303     30 192.168.0.11 TCP_REFRESH_HIT/304 307 GET http://cache.improve.dk/images/interface/topmenu/topbg.gif - DIRECT/89.221.162.250 -
Now, the above log basically confirms that I suck at setting up caching properties for my blog. Naturally, for the first request we’ll get all TCP_MISS statuses as Squid does not have any of the resources cached. For the next request we get all TCP_REFRESH_HIT’s as Squid does have them cached, but it needs to do a 304 check on the server to see if it’s been modified. Had I set a more liberal refresh_pattern, I could’ve cached these and completely avoided a roundtrip to the improve.dk server (resulting in a TCP_MEM_HIT if it’s cached in-memory). But still, the next user accessing the Squid will have the data served locally, even though Squid has to do a refresh check to the improve.dk server. This issue confirms a very important point - Squid will be best for static data that does not frequently change, and can thus be cached safely. Or at least for dynamic content, you have to consider your usage of expiry policies through the HTTP headers.
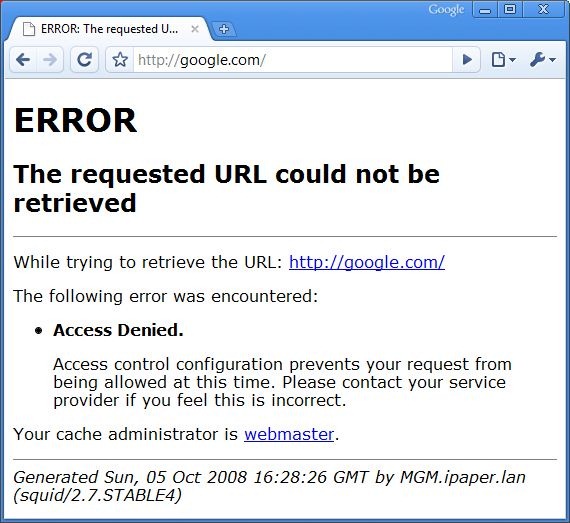
If you add a reference to the local Squid server for google.com, in your hosts line, then you’ll see the error message that pops up due to us filtering away non-improve.dk domains:
Reconfiguration & log rotation
When Squid is running, it’ll ignore any changes you make to the config files until you restart Squid. You can also force Squid to read the config files again without having it restart, simply run the following command:
C:\squid\sbin\squid.exe -k reconfigure -n Squid
To force a log rotation, run:
C:\squid\sbin\squid.exe -k rotate -n Squid
Final considerations
Setting up a Squid server to help speed up your solution for foreign visitors is both cheap & easy. Squid runs in *nix as well as Windows. It has no hardware requirements to speak of and it’s CPU utilization is very limited. Note that it’ll only support a single core, so you won’t get anything from a fancy quad-core setup. Also, it only (there are unofficial builds for x64) runs on x86 so if you want to utilize more than ~3GBs of memory, you’ll have to run multiple instances on different port/ips. As for the setup, I’d recommend to create a special user for Squid that only has access to the Squid directories, otherwise it’ll run with SYSTEM permissions by default.
Squid can not only be used for improving foreign visitor speed, it can also take a lot of static file traffic off of your normal servers. Simply put a Squid in front of your normal servers and let all static/cacheable traffic go through the Squid instead of through the normal app servers.